Your product is the bee’s knees. The best thing since sliced bread. Far better than anything else on the market. But how do you get this across to your potential customers and investors?
Enter: The Explainer Video.
Simply put, these are short videos that explain how things and processes work. Whether they are animated or edited, the formula to creating an explainer is pretty much always the same.
This article will outline the process and guide you on the ingredients to making the perfect explainer video, using real-life case studies as examples.
Step 1: Create a Concept
If you’re at the stage where you’re wanting to create an explainer video, you’ve probably pinned down your unique selling point (USP), carried out competitor research, and may even have an array of target customer personas. If not, we recommend getting a few examples together to help you your potential customers as this will help your video content creation process.
The most crucial question you want to answer is:
What problems do my customers have; and how can I solve them?
Top tip: Make sure your video reflects your business and targets the right audience by frequently referring back to your core values.
Case study
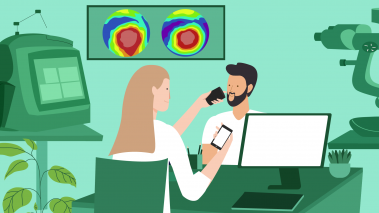
Dr. Ashkan Eliasy is a biomedical engineer whose scientific research is focused on ophthalmology (another word for a fancy eye doctor) from the UK. His startup – OCUWELL – focuses on creating affordable handheld eye exam devices that can be used anywhere, by anyone.
Problem: Standard eye exam devices are bulky and awkward – usually taking up a whole desk. Eye tests need to take place at a clinic, and not everyone has the time or money to get regular checks.
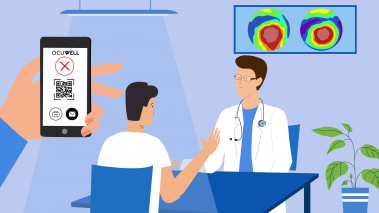
Solution: OCUWELL is an affordable portable device that scans the retina of the eye and sends the image via Cloud for examination by the ophthalmologist. The device can detect eye problems at early stages, meaning more people have access to potentially life-changing medical care.

Step 2: Draft a Script
Now you should have a common customer problem that your product solves. Jot them down, alongside your customer personas – these will make perfect characters for your explainer video.
Next, you can get to work drafting up the script and creating the perfect story outline of how your product or services saved the day!
Top tip: It’s always a good idea to create the first draft of your script yourself, and get those nuggets of knowledge onto paper. No one knows your brand or customers better than you, after all! Once you’ve got a rough outline, a professional scriptwriter can help polish the edges and make it sparkle.
Case study
Dr. Ashkan noted down his ideas for a script using his potential customer personas and situations they may have where his device would solve an issue. For example:
- Doctors using it for patient exams
- Teachers or school nurses checking students
- Elderly people self examining their eyes at social clubs

Step 3: Sketch a Storyboard
You’ve brainstormed ideas. You’ve targeted your ideal customers. The script is sorted. The next step? Sketch a storyboard.
They might look a bit rough and lack detail, but don’t worry – this won’t make the final cut! Storyboards help you visualise the composition of the scenes – where the characters and props will be, how they move and interact, the transitions between scenes – all the technical details that will stitch your story together.
Top tip:
- Take your time making sure you get this step right. At this stage, it’s still fairly easy to make adjustments, change personas – even scrap the whole thing and go back to the drawing board (literally!) By making sure you’re 100% happy with storyboard, you will save yourself time, money and a whole lot of stress that could occur at a later stage should you want details changing.
- It’s also important to make a note of the platforms you intend to share this video on. That’s because each platform requires different aspect ratios. For example:
- YouTube is mainly 16×9
- Instagram is 1×1
- TikTok is 9×16
Case Study: Illustrator drafted the storyboard based on the script, the research of ophthalmology devices has been conducted prior to creating the storyboard to show them in the correct way.
Step 4: Choose a Style
Now is the time to pick out a style for your video. If you have brand guidelines, you may want to refer to this. If you don’t – or if you’re still stuck for ideas, head over to YouTube and check out some explainer videos to help steer you in the right direction.
Top tip: The best inspirations often comes from work that already exists, but don’t worry, you are not plagiarising by any means. Pablo Picasso famously said: “Good artists copy, great artists steal.” Meaning you can take someone else’s ideas and incorporate it into your work in your own original way.
Case Study
Dr Ashkan did not have brand guidelines, he just browsed YouTube and found an explainer video for a healthcare technology manufacturer that he really liked. The style and palette of the video was then taken as a starting point for artistic decisions.
Step 5: Illustrations
When the storyboard and style have been approved, a designer can create vector art for animation. It will look like a storyboard but in color and with much more detail.
Top tip: At this stage, you still have some editing power. You can adjust the style, delete scenes or add scenes.
Case Study
Dr. Eliasy was very specific when it came to how ophthalmic devices should look, as they are specialist pieces of technology. He also requested that real pictures of corneal topography.
Step 6: Get a Voiceover
This step can be carried out at the same time as step 5. When recording a voiceover – or enlisting the help of a professional voiceover artist – make sure you specify what pitch, tempo, and accent you need. Are you looking for something serious and professional, or fun and relaxed? Write down a mini-brief and share it with a selection of voiceover artists, then see if they can record a sample for you to help make your decision.
Top tip: Refer back to your target audience when thinking about the voiceover. What type of voice will resonate more with them?
Case study
Dr. Ashkan chose a calm female voice with a British accent for his video aimed at healthcare professionals. The word ‘ophthalmological’ needed special attention due to its pronunciation difficulty.
Step 7: Animation
Once you’ve got your voiceover all ready, the animation magic can begin!
This is arguably the most time-consuming part of the process, but if you’ve hit the spot with previous steps you should be able to avoid any costly alterations.
Top tip: Make sure the voiceover is recorded before the animation, as the timing of the scenes will depend on the voice artist’s tempo. If the animation was made prior to the voiceover it could require additional stretching or shortening of some scenes, which will increase production time and cost – and sometimes end in a less aesthetically pleasing result!
Step 8: Music and Sound Effects
Once animation is complete, music and sound effects can be added to make your explainer video even more engaging. Your music should reflect the mood you want to convey to your audience, and the emotions you want them to feel while watching. Should it be calm? Upbeat? Electronic? Classical? Consider what auditory experience will compliment your product or service.
Top tip: Sound effects (SFX) can enhance your video dramatically. Unfortunately, most productions avoid them in order to cut the budget, missing out on an entirely different sense to engage your audience through. We recommend adding SFX in your video despite the additional cost – Insist on adding in your video even if it will cost you a little extra.
Case Study
‘Swooshes’ were used when the Ocuwell device travelled from scene to scene – it made the watching experience immersive. Sound influences our perception so much, that it’s likely you can hear the ‘swooshes’ in your mind while reading this!
Step 9: Final Revisions
Turns out there was a mispronounced word in the voiceover, or a glitch in the animation – let’s face it, nobody’s perfect. Make sure you’ve watched your video over several times until you are satisfied that you’ve caught all the bits that don’t quite feel right.
And… Voilà! It’s finally time to roll out your shiny new video and let all your potential customers and investors see how brilliant your business, products and services are.
Top tip: Make sure the videos are rendered according to social media specifications. You’ll need different versions for the web, Instagram, TikTok etc.
Case study
Dr. Ashkan placed the videos on Vimeo and embedded them on his landing page. Explainers increased the time visitors spent on ocuwell.com, and educated them on the product.
Summary
Creating an explainer video for your business can be a great way to showcase your product or service to potential customers and investors.
While nothing can guarantee huge success overnight, explainer videos will certainly help simplify the understanding of your product from the get-go, and they’ll provide the added benefit of boosted searchability (SEO), not just on YouTube but all across the web!
Read more about the types of explainer videos here.
Need to speak to someone about creating an explainer video for your business? Get in touch with our team of experts today.


